Intro: if you’d prefer to read this post in Ukrainian or Russian, you can check it by this or this links.
Unit testing – is a very important part of development for any kind of software. By itself, unit testing – is a testing of separate code modules. One can do it manually, and automated, using dedicated tools/toolkits.
There are three most popular unit test tools (or frameworks, call it as you like) for unit testing in LabVIEW. This is Unit Test Framework from NI, JKI VI Tester from JKI, and also Caraya Unit Test Framework toolkit, also from JKI (for unit testing and assertions).
In this post, I’d like to show some simple example of how you can use JKI VI Tester.
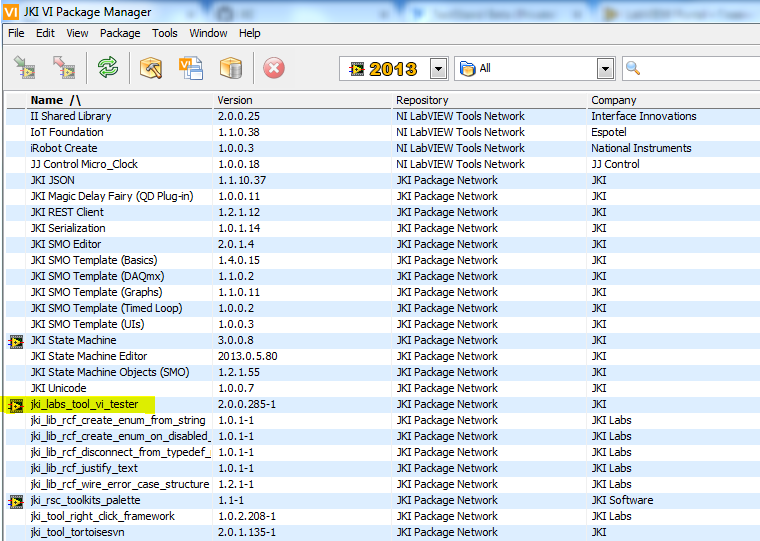
In contrary to NI Unit Test Framework, JKI VI Tester is free for usage. One can install it using VI Package Manager. After installation, toolkit is accessible in menu Tools -> VI Tester.
JKI VI Tester is very easy to use. One can create Test Cases, and Test Suites (which can include Test Cases). Test Cases usually contain tests for separate particular modules/functionality.
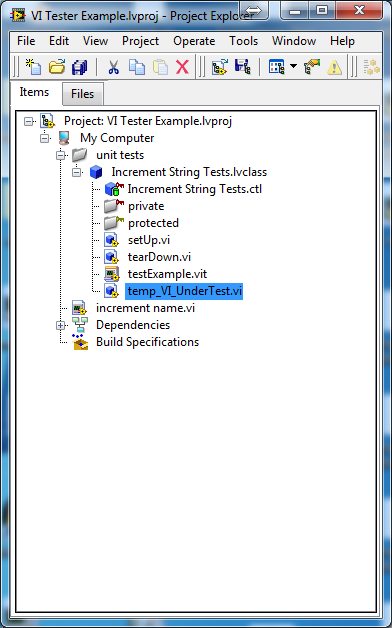
While Test Case is created in the project, the special “test” class is added. It includes setUp.vi, tearDown.vi, and vi-example as template testExample.vit.
One can add the code to the setUp.vi and tearDown.vi, which will do initialization of some test parameters, and deinitialization of those parameters. Thus, when test runs, the following flow is executed: setUp.vi – test.vi – tearDown.vi.
To create new test, one can simply right-click on the testExample.vit -> New from Template. But, don’t forget that all vi-tests must contain prefix / word “test” in the beginning of the test vi. Otherwise, VI Tester will not “see” it in the project.
So, in that new created VI one can add test itself. JKI VI Tester API VIs are accessible in the functions palette JKI Toolkits. One can use them to create tests, particularly – do define conditions at which test will be passed or failed.
And now, let’s jump directly to our small example.
Let’s imagine, that we need to create code module, which will increment numeric suffix of the string. And, there are the following requirements to its functionality:
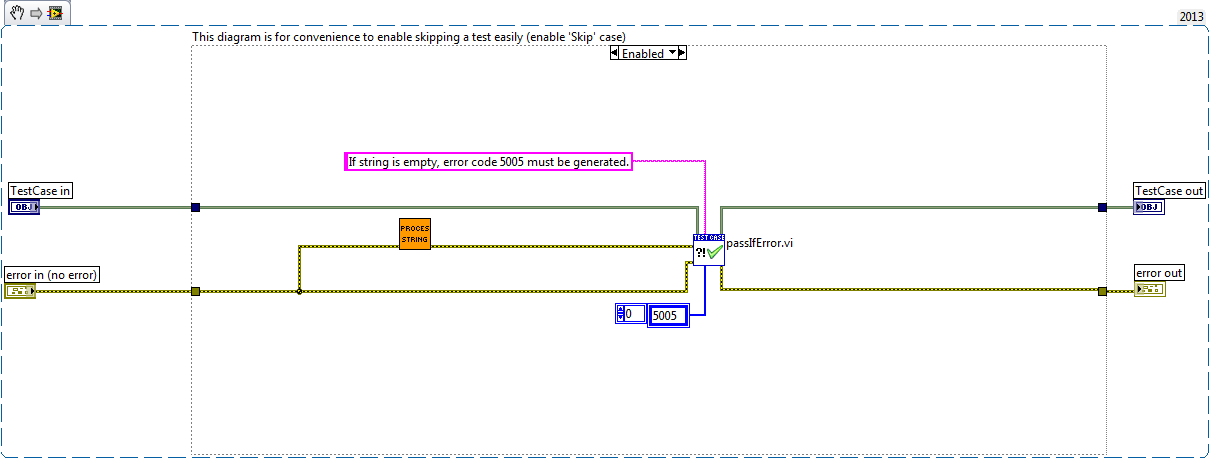
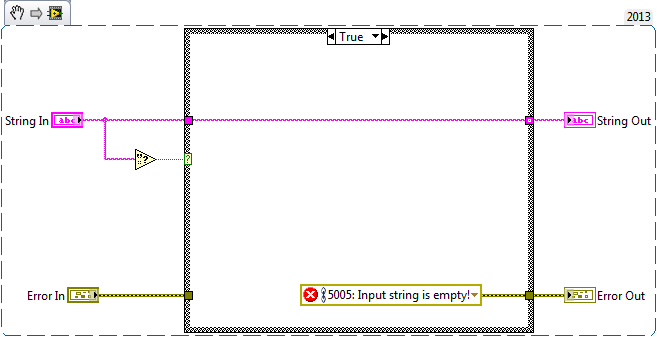
- If the row is empty, error 5005 should be generated;
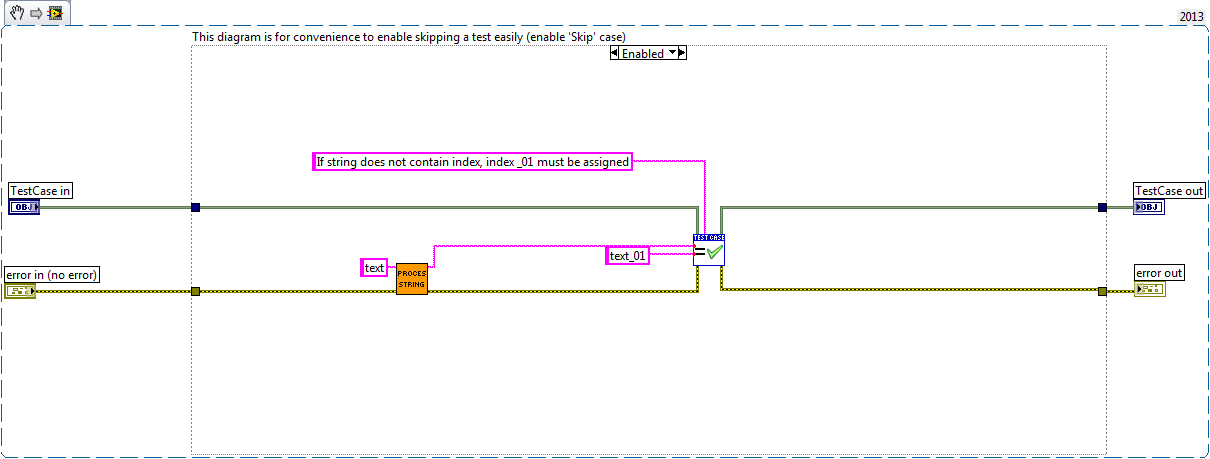
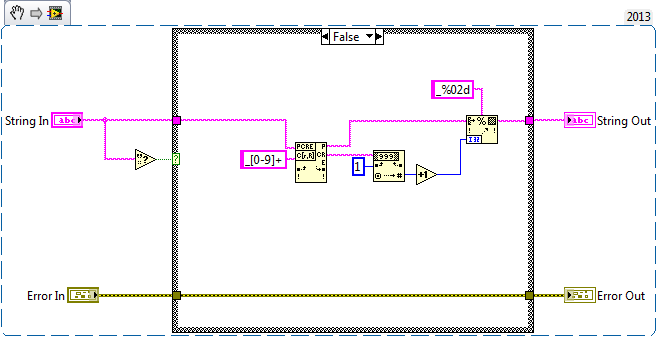
- If the string does not contain numeric suffix, it should be added to it (string -> string_01);
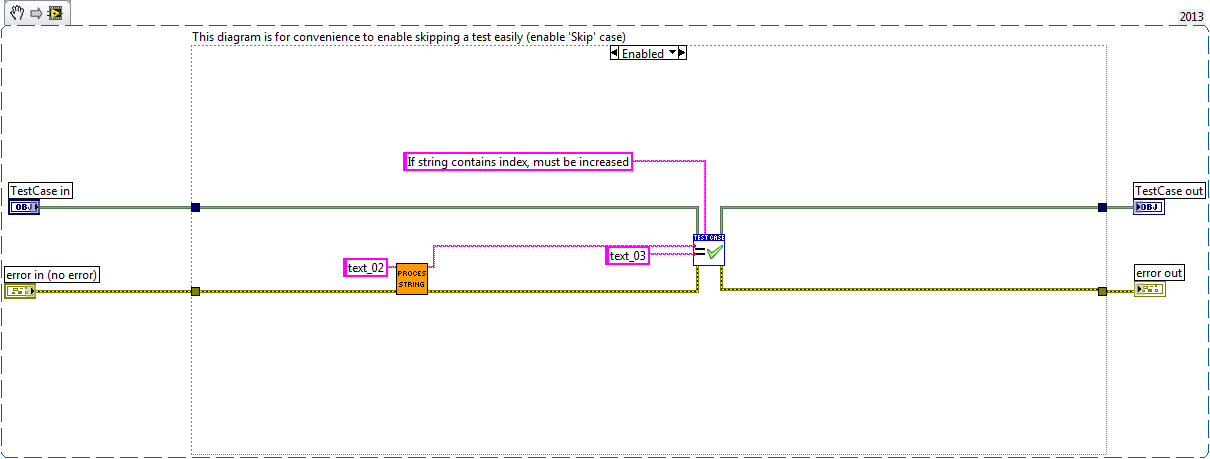
- If the string already contains numeric suffix, it should be incremented (at least with 2 digits, like (string_02 -> string_03).
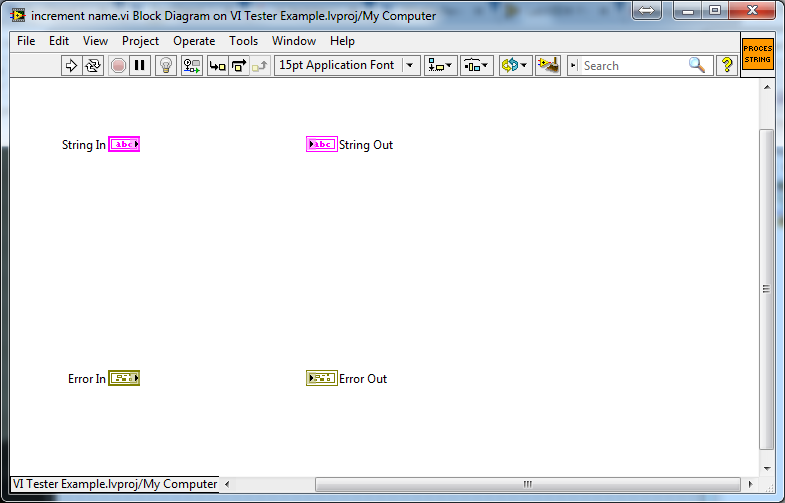
So, requirements seem to be clear, so we can create template/draft of our module, with all the inputs/outputs.
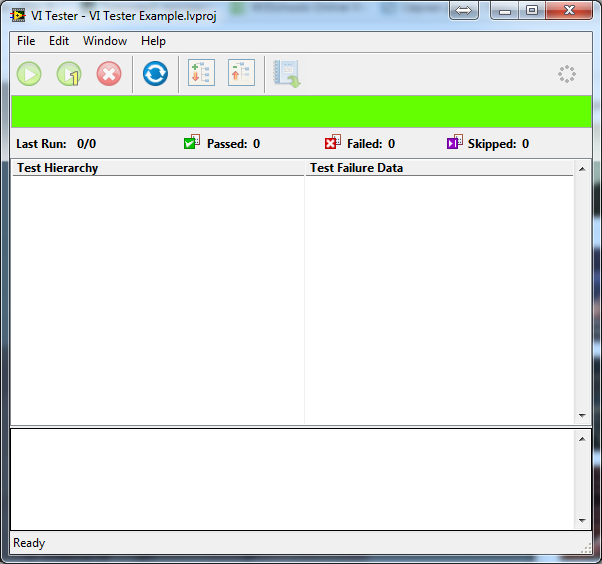
Now, let’s start the VI Tester. To do it, go to Tools -> VI Tester -> Test VIs…
As the project does not contain any tests now, tests list is empty.
Let’s add tests. For it, go to Tools -> VI Tester -> New -> Test Case…, and save created test class.
Now, we can create three tests, based on our requirements. After VIs are created, save them, and save the project itself (it’s important, b/c otherwise VI Tester will not detect tests at the moment).
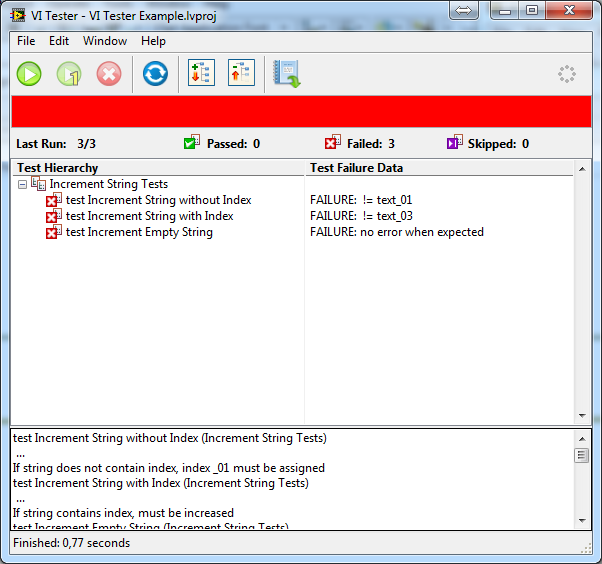
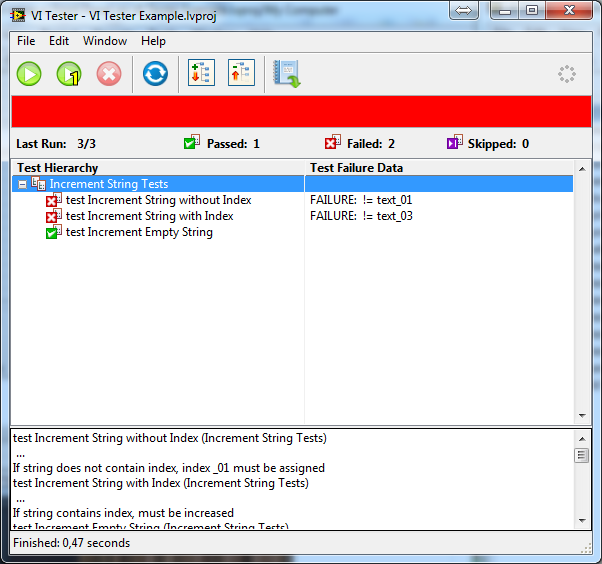
Now, go to window of VI Tester, press button Reload – and we can see all implemented tests. Press button run, and we make sure that all our tests have Fail status (and it’s expectable, b/c our module-under-the-test is empty, not implemented yet).
Let’s implement the requirements. The first point will be verification whether string is empty or not, and generation of the error if string is empty.
Module is saved, let’s run the test. Now, one of three tests is passed.
Now we’re gonna to implement two more requirements, and run the tests.
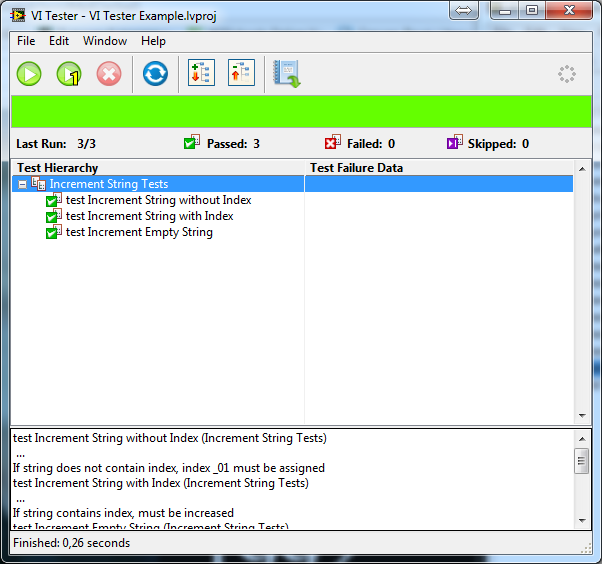
All the tests are green, what means that functionality of our module is correct (in other words, module is working at least accordingly to the requirements).
Of course, one can tell, that such simple functionality would be easier to test manually. But just imagine, that there are more requirements to the module. And with time, we can do some changes in its implementation – and it means, that we will need to test it more and more times manually. And moreover, one can have in projects dozens or hundreds of such code modules – and then to test all of them manually will be quite painful, and time consuming.
Statistics says, that implementation of unit tests increase development time on 50% – and that’s true. But just imagine, how much time can be wasted by testing code modules over and over again…
But if one will invest time, and create such small tests for code verification, he could save time for testing, and what is more valuable – he will be sure, that all the implemented algorithms work correctly.
Also, it is possible – using VI Tester API – to create code, which will run tests directly from the project – for example, during build of library, or executable. Using Pre-Build Action and VI Tester API, VIs will be tested automatically, so quality and functionality of the code modules will be guaranteed.
Additional features/benefits of the JKI VI Tester are that it has open source code (there is repository on GitHub), and it has object-oriented architecture, thus one can modify internal test algorithm logic according to his needs.
Summarizing all written above, as for me – JKI VI Tester is a great tool, and every LabVIEW developer should use it every day, because it really can make developer’s life easier, and help to write robust and correct code.
And now question to you, my dear reader – do you use some unit testing approaches/toolkits/frameworks during code development?
P.S. Featured image is taken from https://twitter.com/jkisoftware/status/859061333903515649, hopefully no copyrights are touched )
Source code (LabVIEW 2013) (click to download zip-archive): VI Tester Example.




One thought on “JKI VI Tester – useful tool for LabVIEW developer”